We will create a Postman Collection, which makes an anonymous GET request to an IAM-secured API Gateway endpoint. The collection fetches credentials for an unauthenticated user and stores them in collection variables for subsequent requests.
Create the API
In order to get this running, we first need an API. We create an API with the following attributes:
- Name – just a name (in my case ‚Test API‘
- Description – just a description (‚Hagen’s test API‘)
- Endpoint Type – ‚Edge Optimized‘ (see here/ which types are supported)
Next, we select Actions → Create Method to create the GET method. For now, we will set it up as a Mock integration.

After clicking on Save for this method, we can see the overview page for this method.

To actually generate some sort of response, we add a Mapping Template for the Integration Response:

You could configure any sort of hello world response, or − as shown here − use the template ‚Method Request passthrough‘, which will return some of the context parameters of the request.
Now we select Actions → Deploy API, where we define a new stage for the deployed API (I called mine ‚test‘) and will receive the endpoint URL for this stage.

Now open Postman, create a collection, and add a GET request to the collection. Use the URL from above and send the request. It should return something like this:
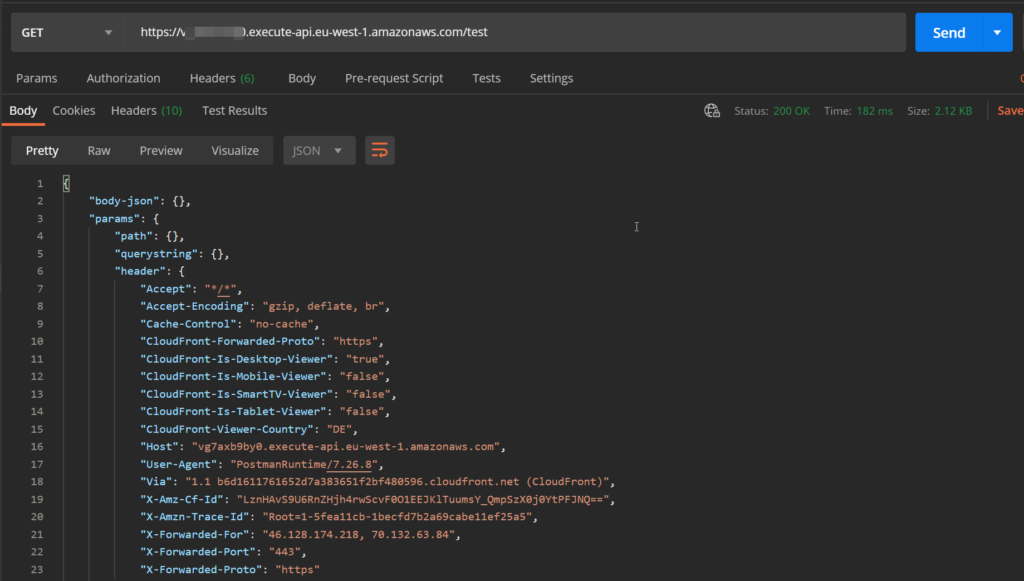
Further down in the response, there are request context attribtus where you can find things like the api-id , the ressource-id (each method of the API is a resource), a request-id, your current IP address and so on.
Works so far.
Create the Cognito Identity Pool
In the Cognito console select Create identity pool and tick the checkbox ‚Enable access to unauthorized identities‘. Click Create Pool.

On the next page click on Allow. Do not make any changes in the details section!
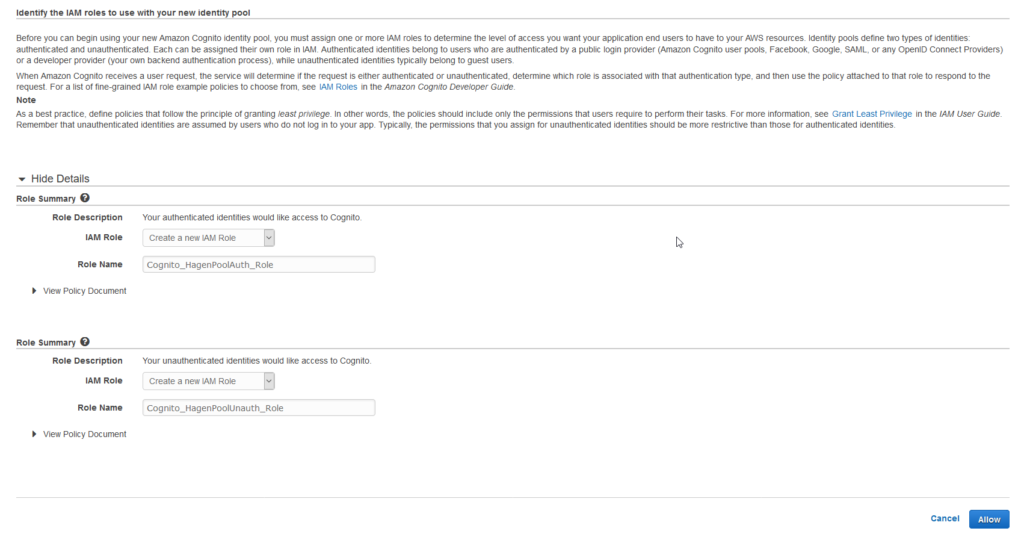
If you are already in development of an app or service, you might already have roles for your app client or users. You might be tempted to directly use these roles here. Don’t do it, though. We will use ‚real‘ roles later. For now, let’s see, what happens.
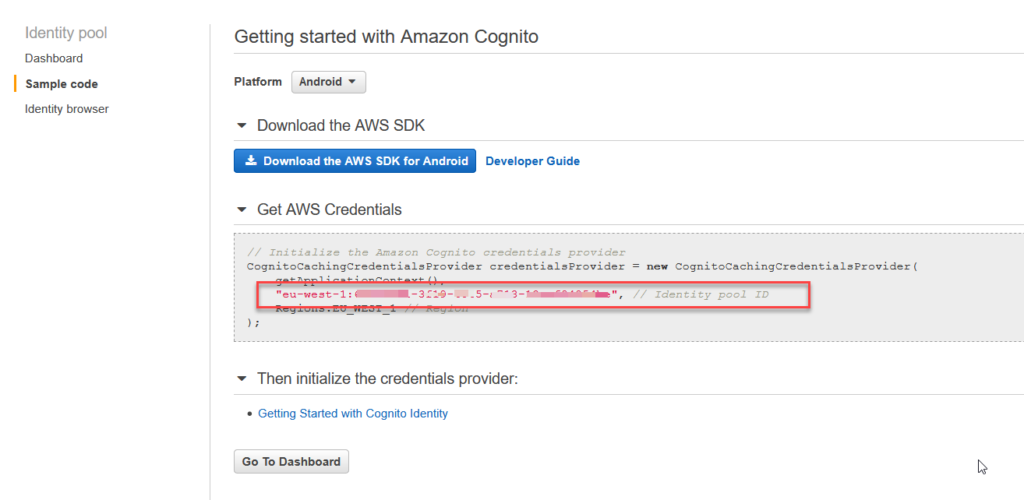
The next page will give you the identity pool’s id. Copy it to a spreadsheet.
When creating the pool, AWS created two roles for us. Their names are Cognito_PoolNameUnauth_Role and Cognito_PoolNameAuth_Role. Head over to the IAM console to examine them. You will see that the role has a corresponding policy assigned to it. This default policy allows users or services with that role to write stuff to mobile analytics and to use the cognito sync service. The role for authorized users in addition allows to use the cognito identity service.
More important, however, is what we find in the tab ‚Trust relationships‘:
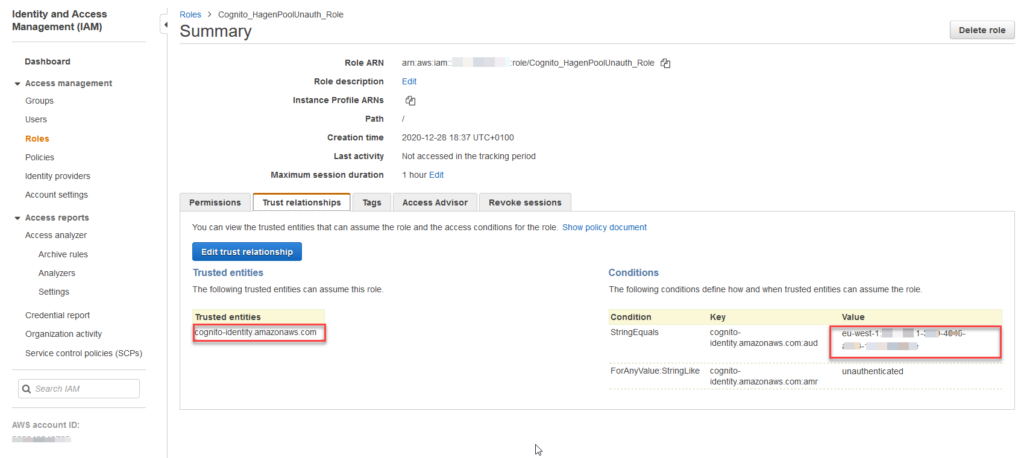
The cognito identity service is allowed to assume this role. Only if Cognito is allowed to actually represent a ressource with this role, it will be possible for all other services to decide whether a request through the API is authorized or not.
Secure the API
We will now add an authorization check to the API. In API Gateway, this is done by adding an Authorizer to each API method, which you want secured.
In the API Gateway console, there is a section ‚Authorizers‘, where authorizers can be created and configured. In addition, therei is one authorizer for standard AWS authorization via IAM, which is always available. We will use this one.
In the GET method of the API, click on Method Request and change the value of Authorization from NONE to AWS_IAM.

Re-deploy the API and use Postman to send the GET request again. If authorization checking works, you should get the following response:
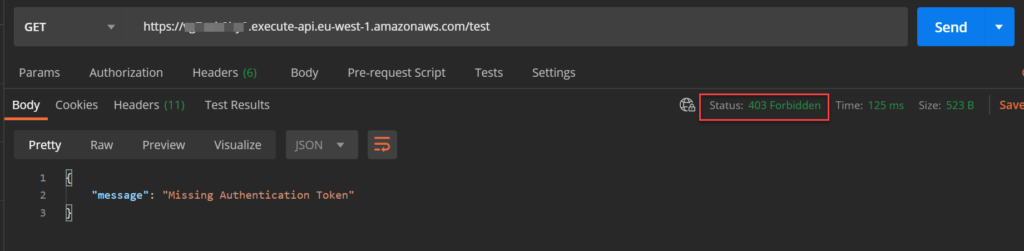
This means, everything works fine.
Now we need to add an authorization token to the Postman requests.
Add User Credentials to Postman Requests
For unauthenticated users, the basic flow of events is as follows:
- Request an identity from an identity pool. If unauthenticated access is allowed, the identity pool will generate a new identity and return it.
- Request credentials for the new identity.
- Use credentials to make an API request.
Those three steps correspond to 3 requests in Postman.
Request 1:
This is a POST request to the endpoint URL https://cognito-identity.your-region-1.amazonaws.com/ with the following body:

and two additional header fields:
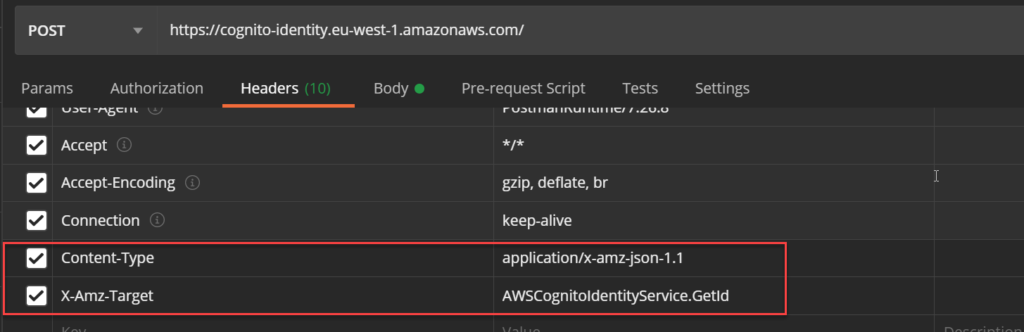
This where the identity pool id comes into play. The operation requested with this POST is in the X-Amz-Target header field and the content type must be set to application/x-amz-json-1.1.
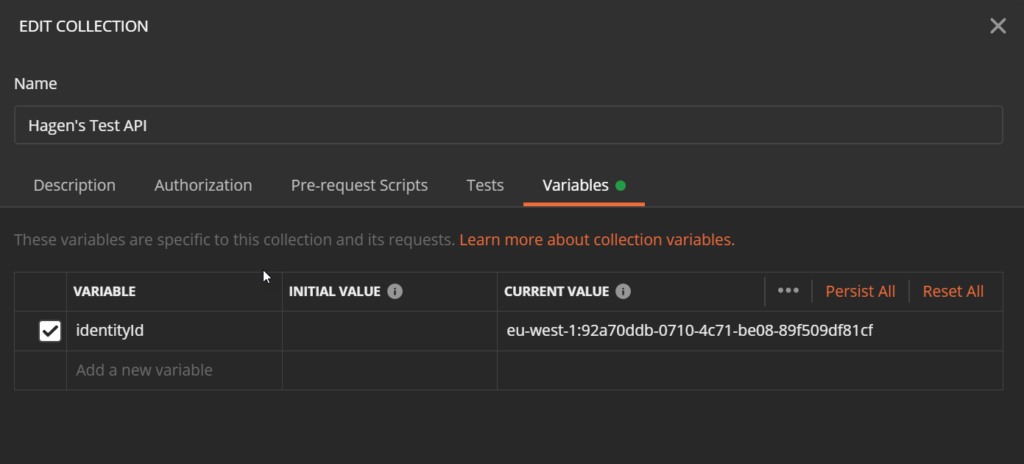
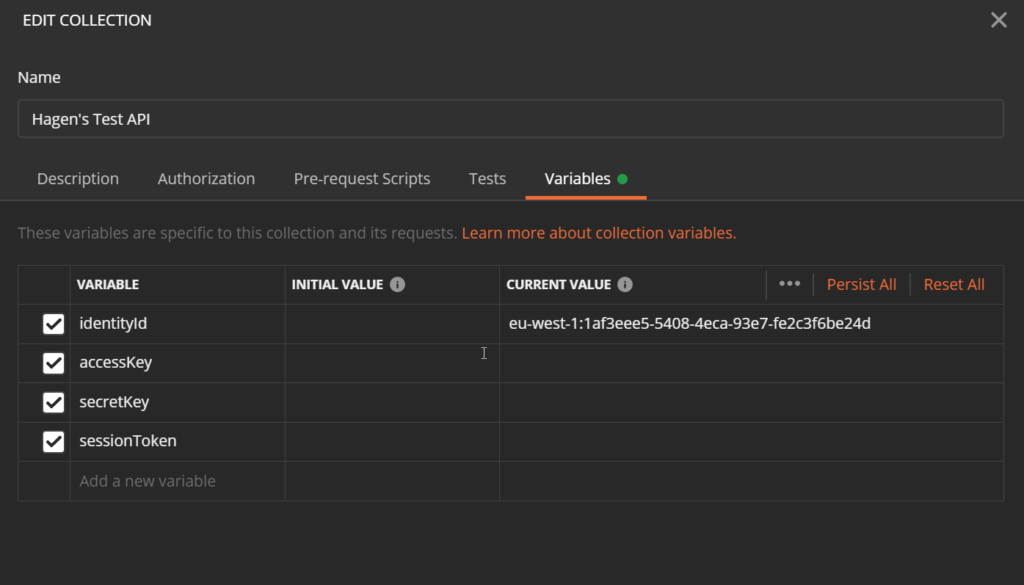
The request should respond with an identity id. To reuse this identity id in the next request, where we want to get credentials for this identity, we need to store the id in a Postman variable. For that, we create a collection variable named identityId. Select Edit in the context menu of the collection and navigate to the Variables tab.

In the test script of the request, we set the collection variable:

When we re-run the request, the collection variable should have a Current Value.
Request 2:
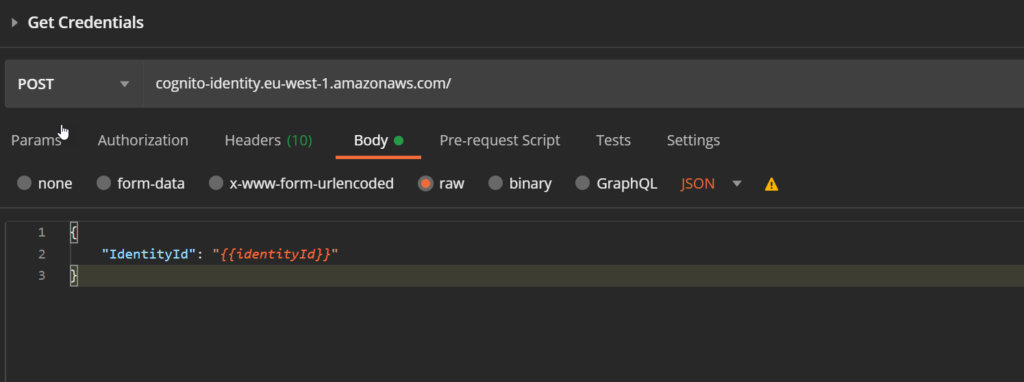
This is another POST request to the same endpoint, but with another X-Amz-Target operation: AWSCognitoIdentityService.GetCredentialsForIdentity
The body of the request will reuse the identity id we received from the first request:
If we send the 2 requests one after another, we will receive credentials for the unauthenticated user:

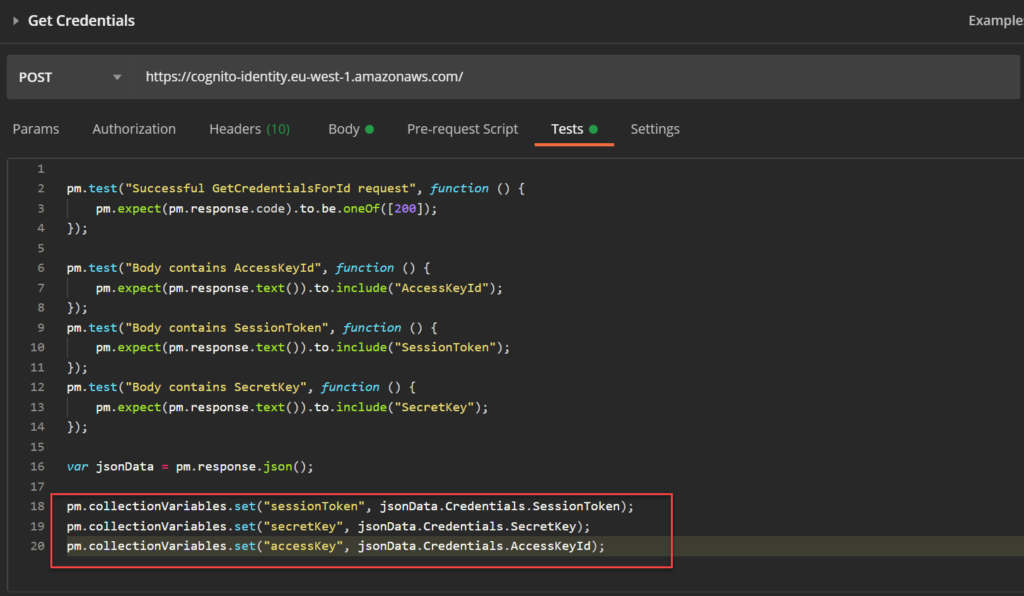
For the 3rd request (the actual GET request we already created), we need the AccessKeyId, the SecretKey, and the SessionToken. All three are added as collection variable like for the first request.
Again, the test script for this request needs to save the values:
Re-run both request and check that all 4 collection variables are set.

Request 3:
Now we can make the actual GET request to the test API. The only thing we have to change is the Authorization settings of the request.
Select the authorization type AWS Signature and use the 3 credential variables in their respective value fields. Set the correct AWS region and the Service Name to execute-api.

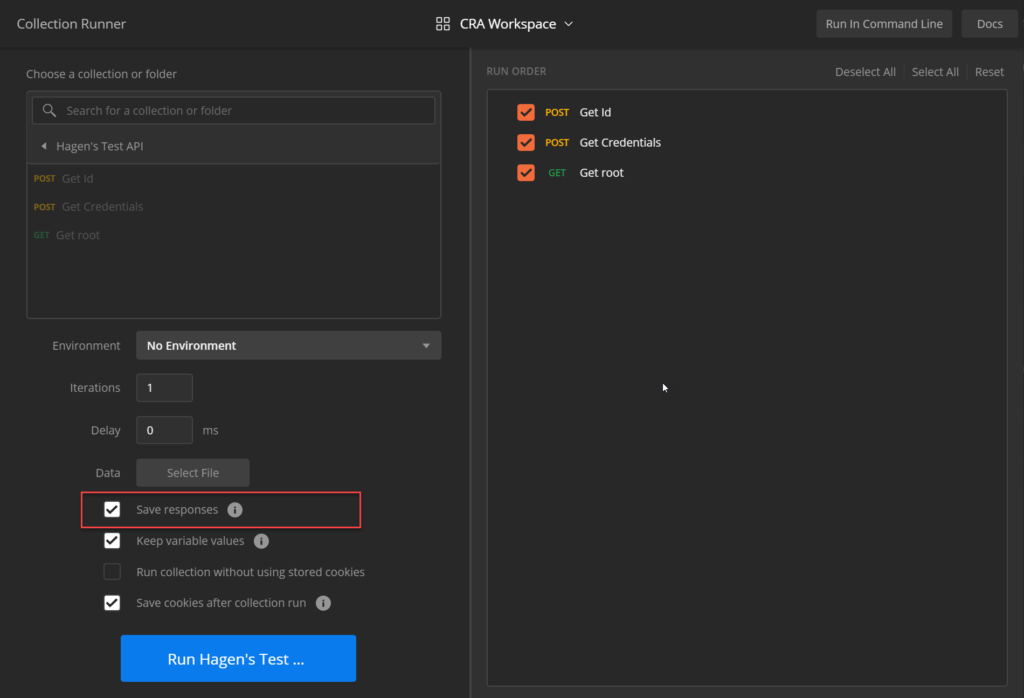
To test all requests, start Postmans Collection Runner and select the collection. You might want to activate the Save Responses check box at first in case you need to search for errors.
Running the collection will result in…
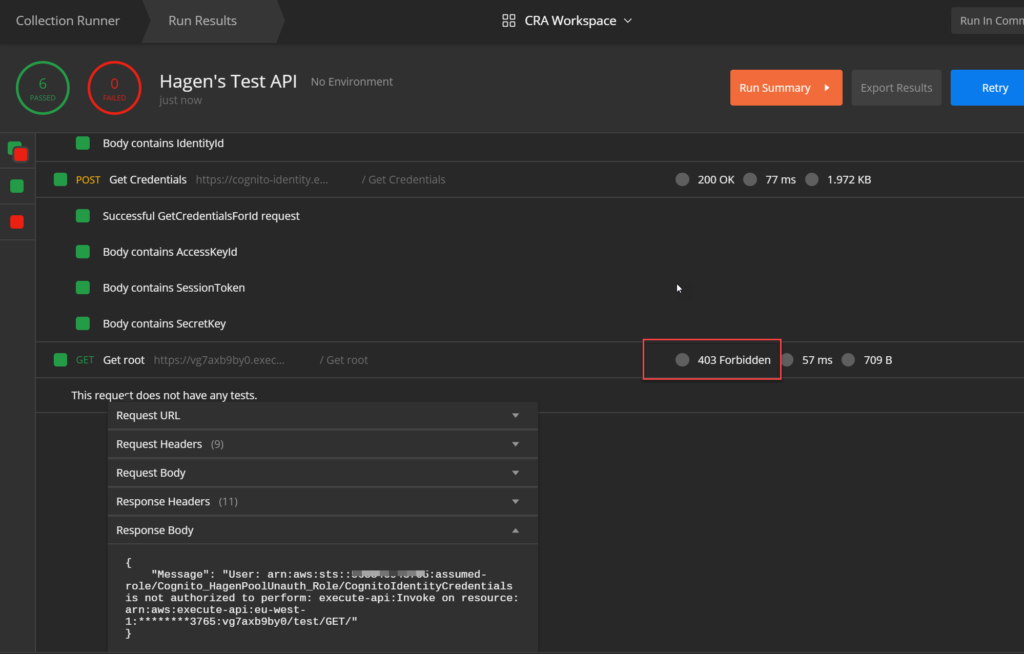
… another error!
But this time it is not the missing authentication token error from before. Instead we receive a detailed message what went wrong: the user is not authorized to perform an execute-api action on the requested resource. The message even tells us, which role was assigned to the user when the request was made.
Enhance the Role to Allow API Requests
The last thing we need to do now is to allow our unauthenticated users from the identity pool to use the API. The corresponding service we have to grant is not API Gateway (that one is for managing the API itself) but Execute API.
In the IAM console, we select the role (Cognito_HagenPoolUnauth_Role in my case) and add an inline policy.
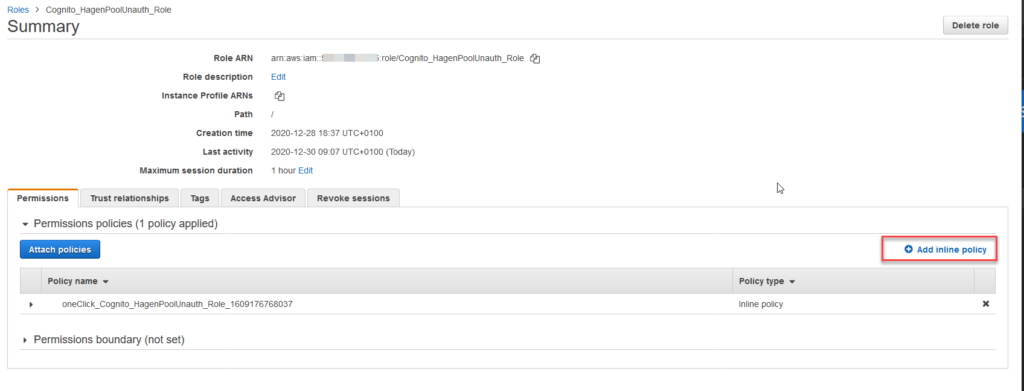
In the policy editor, select the JSON tab and enter the following:
{
    "Version": "2012-10-17",
    "Statement": [
        {
            "Effect": "Allow",
            "Action": [
                "execute-api:Invoke"
            ],
            "Resource": [
                "arn:aws:execute-api:eu-west-1:123456789012:ab12cd34ef/*/GET/*"
            ]
        }
    ]
}
The ARN after arn:aws:execute-api: is constructed as follows:
- The region code of the API followed by a colon
- The AWS account id followed by a colon
- The API resource id followed by a slash
- The API stage (or ‚
*‚ for all stages) followed by a slash - The method name followed by a slash
- The resource path at the API endpoint (or ‚
*‚ for all paths)
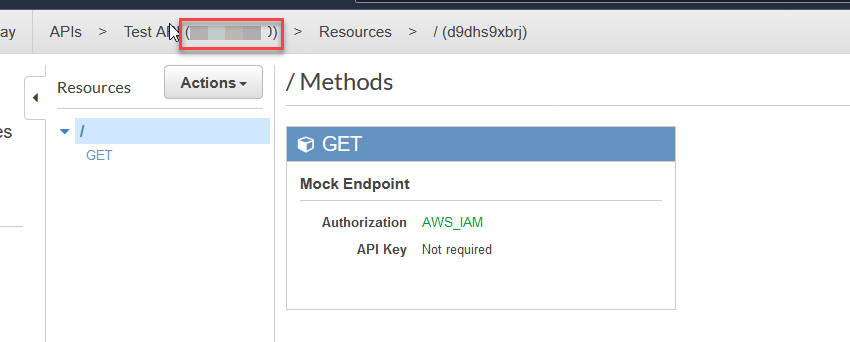
The API resource id can be found in the API Gateway console. For example here:
Save the policy and re-run the collection in Postman. If everything worked out, you should find something similar to:

Summary
We created a Postman collection, which gets the credentials for an unauthenticated user from a Cognito Identity Pool. The corresponding user role grants access to an API. The credentials can be reused in subsequent test requests.